----------------------------------------------------------------------------------------------------------------
In my previous post, we covered security policy matching based on user identity and device context provided via the GlobalProtect app. We also enabled notifications to the end user based on compliance of the endpoint. In this post, we are going to configure Authentication Policy with MFA to provide elevated access for both HTTP and non-HTTP traffic to specific sensitive resources. You can see a diagram of the environment here.
The value in leveraging Authentication Policy with MFA is to ensure that regardless of whether or not a user is known and the device is compliant, they must authenticate with multiple factors to validate their identity prior to accessing a specific resource. This helps prevent lateral movement by malicious attackers that are persisting internally via a compromised machine or with phished credentials.
Note - This post assumes the following:
- You have already followed the previous posts in this series.
- You have DUO MFA configured.
Part IV - Authentication Policy with MFA
- Navigate to Device -> Certificate Management -> SSL/TLS Service Profile -> Add to create a profile that references the root CA created previously

- Navigate to Device -> Authentication Profile -> Add to create a new profile that consists of the LDAP and DUO Server Profiles that were previously created
- On the Authentication tab
- Enter a Name
- Set the Type to LDAP
- Set the Server Profile to LDAP
- Enter a Login Attribute of sAMAccountName
- Set the User Domain to your domain

- On the Factors tab
- Check the Enable Additional Authentication Factors check box
- Add the Multi Factor Authentication Server Profile that was previously created as part of your DUO setup

- On the Advanced tab, select the user group previously created to add to the Allow List
- Click OK
- Navigate to Device -> User Identification -> Captive Portal and click on the gear icon
- Check the Enable Captive Portal check box
- Select the SSL/TLS Service Profile and Authentication Profile that were previously created
- Set the Mode to Redirect
- Set the Redirect Host to an IP address of an interface on the firewall
- In my case, its the IP address of my trust interface
- Click OK

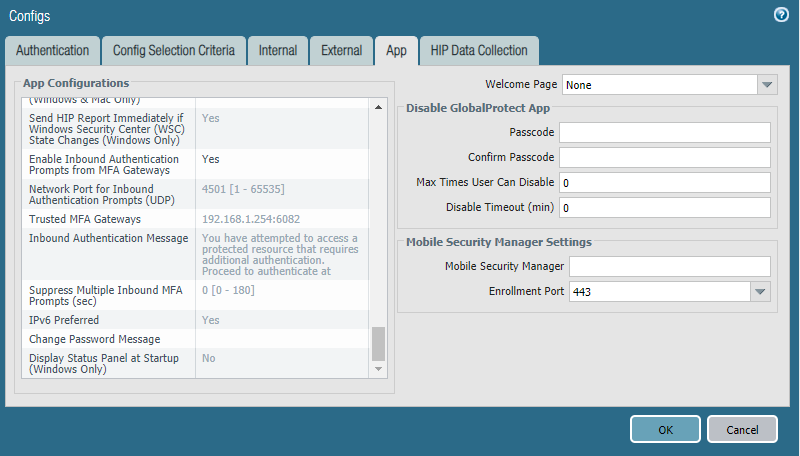
- Navigate to Network -> GlobalProtect -> Portals -> select the previously configured portal -> Agent -> select the previously configured config -> App -> and change the following App Configurations parameters
- Set Connect Method to User-logon (Always On)
- Set Show System Tray Notifications to Yes
- Set Enable Inbound Authentication Prompts from MFA Prompts (UDP) to Yes
- Set Trusted MFA Gateways to the IP address referenced in your Captive Portal along with port 6082.
- In my case its 192.168.1.254:6082
- Click OK
- Navigate to Objects -> Authentication -> Add to create a new Authentication Enforcement
- Enter a Name
- Set the Authentication Method to web-form
- Set the Authentication Profile to the MFA profile that was previously created
- Click OK

- Navigate to Policies -> Authentication -> Add to create an authentication rule
- Note - If you need a resource for testing, there are plenty of test SSH servers available publicly. In the example below, that is what I am using.
- As shown below, any user from the trust or gp zone that is destined to a specific server in the untrust zone will be prompted to authenticate, regardless of whether they are a verified user or not.

- Commit the configuration
- Lastly, when testing with a Windows client, make sure that the host firewall is allowing UDP port 4501 inbound.
You should now be able to test access to the resource. Here is the general workflow that you can follow:
- Ensure that the GlobalProtect app is connected to either your external or internal gateway
- From operational mode in the CLI, run the show user ip-user-mapping all type CP to show authenticated users
- It should show 0 users
- Attempt to access the resource referenced in the Authentication Policy rule, and you will see a prompt requiring you to authenticate

- Upon authenticating via the factors you defined, you should be able to access the resource, as well as run the same show user ip-user-mapping all type CP and see your user account

